
|
The faux walls for the inside of the carport. "Faux" is a French word, meaning "fake." I could have said "fake," but "faux" sounds more intelligent. |
|
|
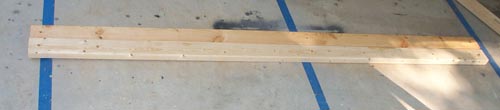
The vertical supprts for the frame are two 8' 2X4s. Half-inch holes have been pre-drilled at 2", 11.5", 53", and 7'10" (or, 2 inches form the top). These are for support bolts to be placed later.
|
|
|
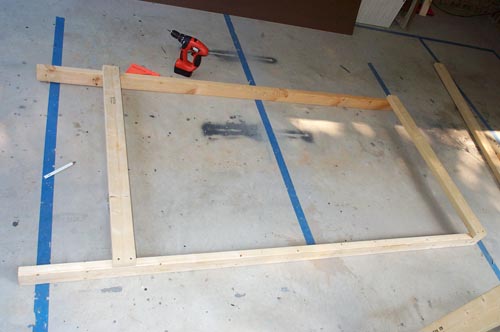
Here is the raw frame. It is the two 8' pieces from above and two 4' pieces. The top 2X4 is flush, the bottom is pulled up 13" from the floor because of the odd shape of my carport. You will see in a moment.
|
 |
|
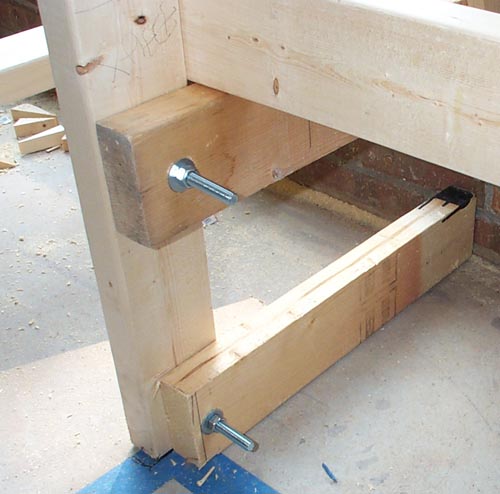
OK, here's where the hard explanations start. This is the bottom kick board, so calle dbecause it keeps the wall from being kicked at the base. It is not structural. It just keeps the bottom from being knocked in. Above it, at the 11.5" mark is the bolt holdiong the structural support. Notice that the structural support is mounted flush against the horizontal brace. This keeps it from folding up. It is incredibly sturdy.
|
 |
|
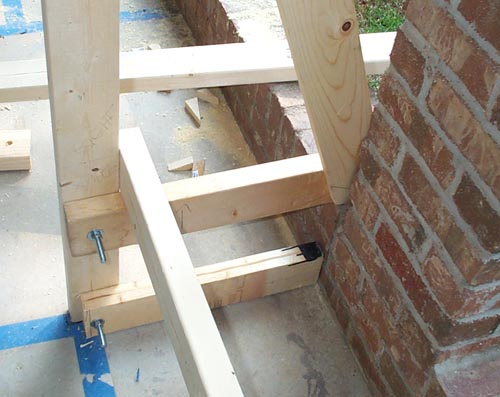
Another shot of the same. You can see how the kicker presses against the small wall of bricks. You can also see the structural leg and it's angled 1X4 support. We'll get to it in a moment. Just realize that a triangle is the stronest structure.
|
 |
|
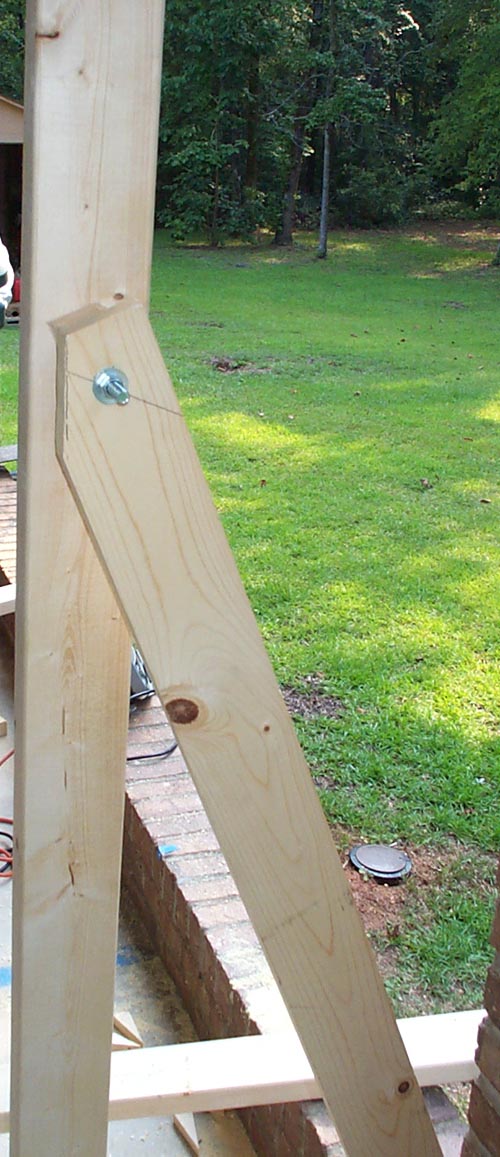
Big oversized shot of the angled support. This is bolted at the 53" mark. We drilled a hole on the upright at 53" (because it seemed right), drilled a hole in the middle of the 1X4 two inches from the top, then drilled a hole two inches form the othe rend of the 1X4. We then stuck a pencil through the hole and made an arc on the bottom 2X4. We split that arc in the middle of the 2X4 and drilled. Bolt went through and we had triangular support! There is, however, a spacing issue....
|
|
|
| If you will remember, we have a 2X4 upright attached to a 2X4 support leg. Then we have a 1X4 angle support leg. Because of the 2X4 support leg at the bottom, we needed a spacer between the upright and the 1X4. So, we pulled some scrap 2X4 (we have a lot of this laying around), drilled a hole in it, and, presto! Spacer! Doesn't have to be huge. You'll also notice in this picture that we cut off part of the angled support. This is to prevent the corner form ramming into our pretty (and pretty expensive) faux stone panelling. Bolt. Washer. Nut. Tighten. |
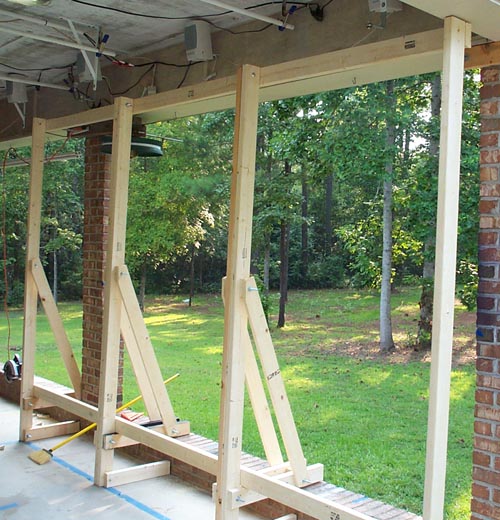 |
| Three frames in a row! Look at the middle frame. Those bolts are shared with the frames next to it, making the entire set of frames a single structure. This makes it not only more stable, but less likelt to go anywhere, either by wind or on its own. Ummmm.. ignore the broom. It's not part of the wall. |
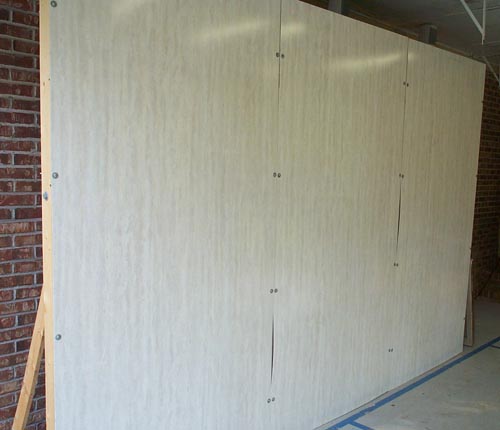 |
| And here is the opposite wall of three completed panels. The facing is fauw marble panelling form Lowe's. About $15 a sheet, but less likely to die than foam, requires no painting, holds up well in the carport. The metal dots are carriage bolts and washers. I insist on everything being dismantleable (which probably isn't a word, but, in the style of Shakespeare, it is now). Carriage bolt goes through washer, through facing, through vertical 2X4, through washer, onto nut. Tighten. Repeat 7 more times for each panel. Faux wall!
OK. A few of you will be observant enough to notice the difference in support design. Because my left wall is an actual wall, we didn't have to fight with the small brick wall as on the right wall. No separate kickboards and support feet. In these, they are one and the same. Other than that, both sets of frames were designed similarly. I mean, when all is said and done, it's just a 4X8 frame with a panel on it. Stand it up any way you like. |